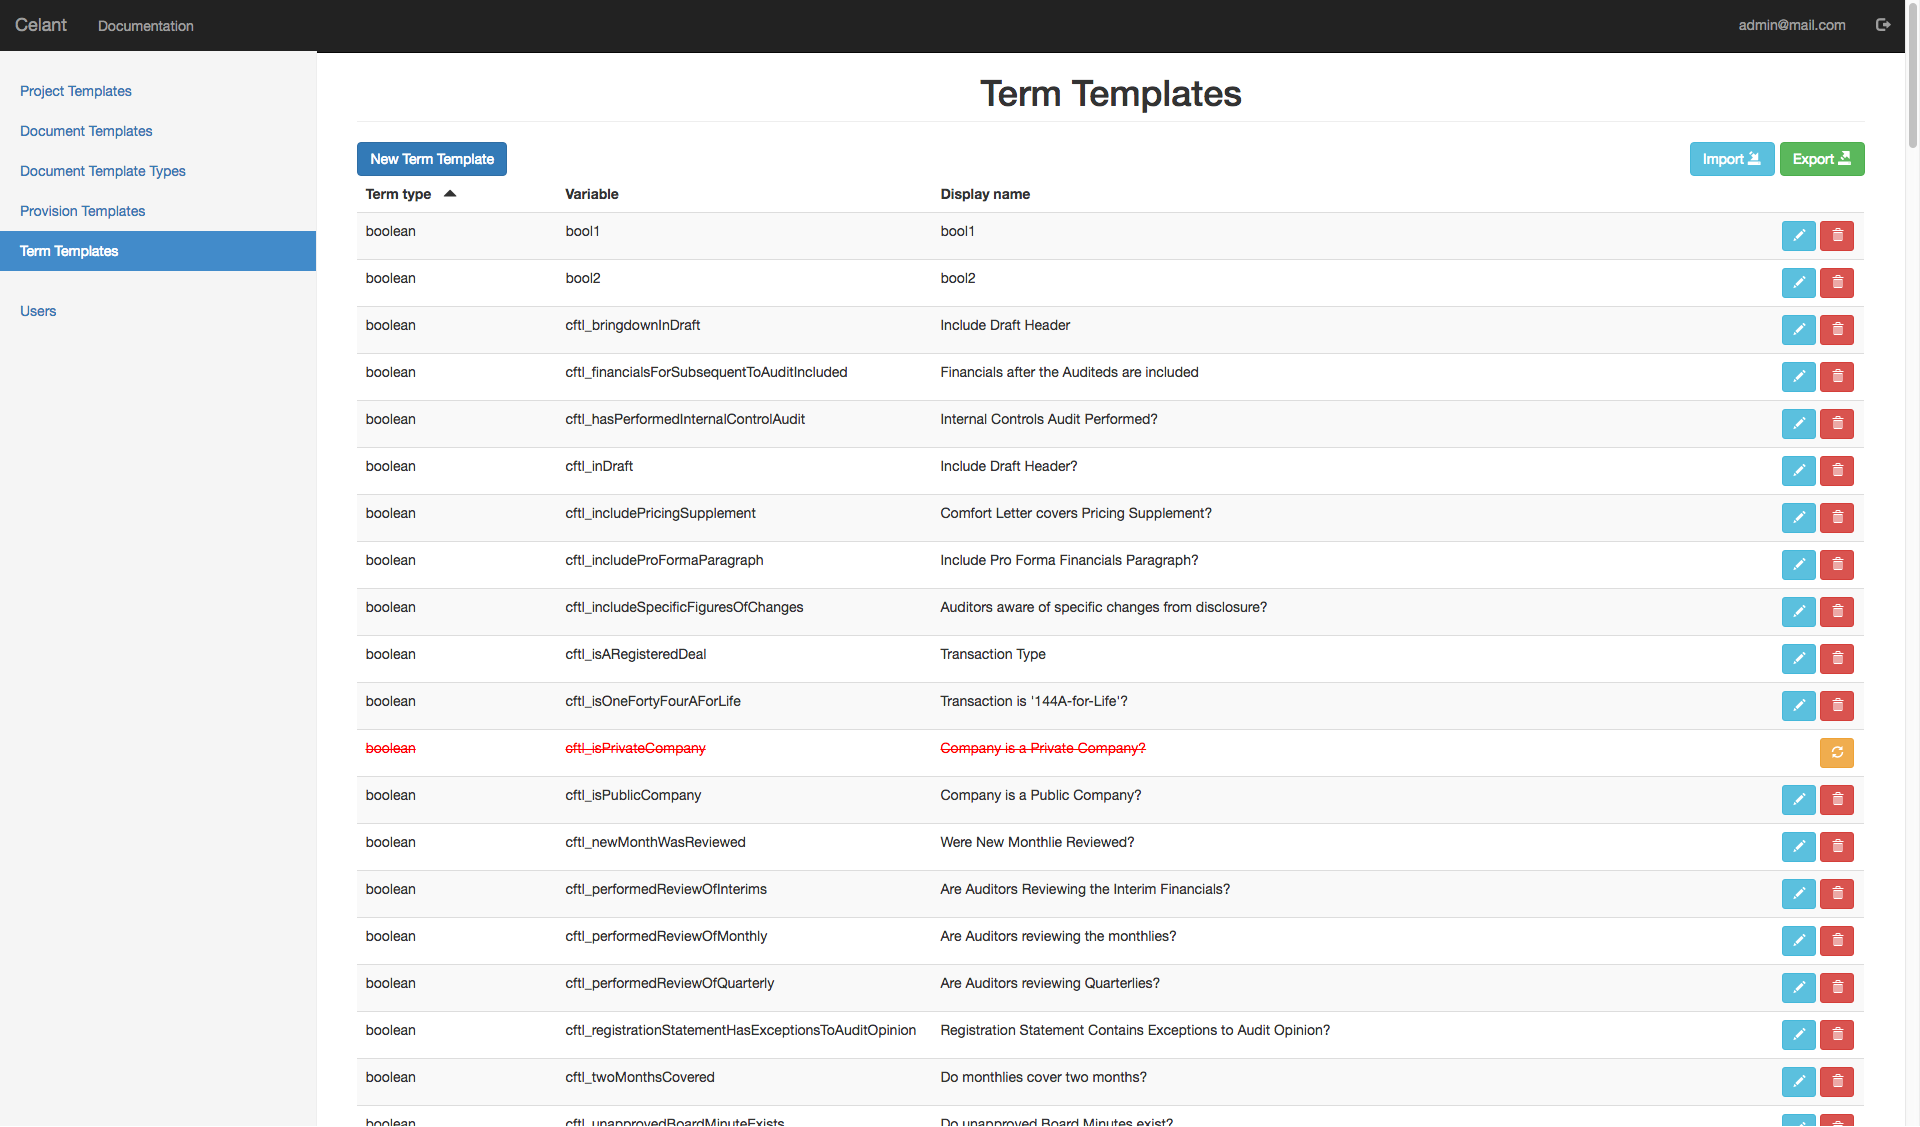
Term Templates
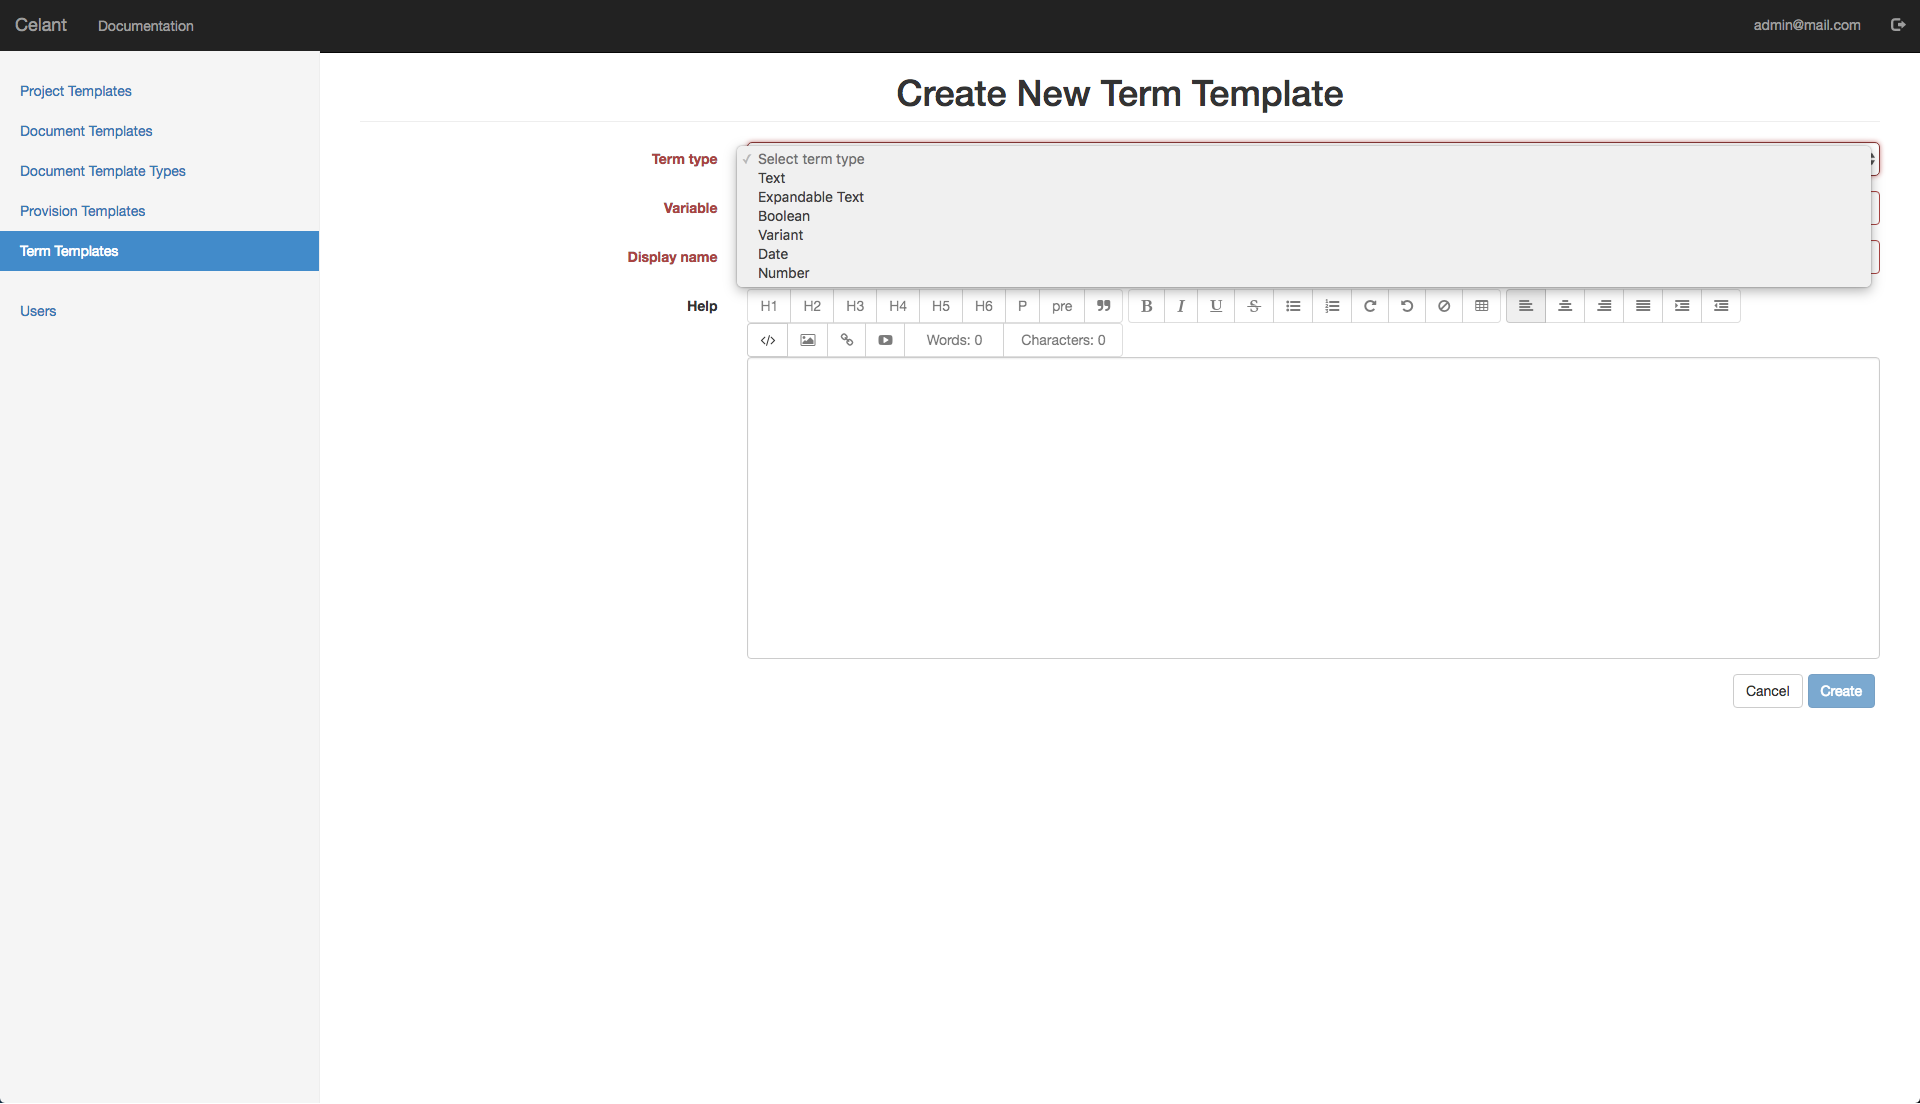
Term Templates, on a fundamental level, are variables that represent a value (or multiple values) that will be determined by the User. As you can see from above below screen shot, you can create New Term Template, or alternatively, you can import them from CSV.
When creating a new Term Template, there are 6 Term Template types to choose from:
- Text
- Text Plus
- Text Area
- Number
- Date
- Boolean (True/False)
- Variant (Dropdown)
1. Text
Text is the field that hold text variable. Under Term Type, choose Text. Then under Variable field, you name the variable. Characters that are permitted are A-Z, a-z, 0-9, and underscore. Special characters are NOT permitted, except for the underscore. An example would be "company_name" (without quotes).
The Display Name field is what the User will see when prompted to input the field. This can contain special characters including spaces, which should help in describing briefly the information the is requested from the User - for example, "Company Name". It can also be phrased as a question, as in: "What is the Company Name?"
There is an option to set either a Placeholder or Default Text. Placeholder shows up when it is blank, and as soon as the user types into the document, it disappears automatically. Default Text, on the other hand, requires the user to delete the text, before the information is replaced. In either case, a Placeholder or Default Text is required. If you are not sure what to put into this field, you can also in brackets "[ ]".
Help field is the text that the User will see on the right hand side of the screen when as Help text. You can also imbed videos, pictures or links.
2. Text Plus
Text Plus is similar to the Text variable except that in addition, it permits Users to create sub-fields, that is a separate text box that appears right after the current text box. This is handy if the contract contemplates one or more parties. There are two additional check boxes: 1. Automatically insert commas/and will insert the commas and 'and' at appropriate places. 2. Insert line break will insert a new line before the new text box; this is helpful for lists.
Under Variable field, you name the variable. Characters that are permitted are A-Z, a-z, 0-9, and underscore. Special characters are NOT permitted, except for the underscore. An example would be "company_name" (without quotes).
The Display Name field is what the User will see when prompted to input the field. This can contain special characters including spaces, which should help in describing briefly the information the is requested from the User - for example, "Company Name". It can also be phrased as a question, as in: "What is the Company Name?"
There is an option to set either a Placeholder or Default Text. Placeholder shows up when it is blank, and as soon as the user types into the document, it disappears automatically. Default Text, on the other hand, requires the user to delete the text, before the information is replaced. In either case, a Placeholder or Default Text is required. If you are not sure what to put into this field, you can also in brackets "[ ]".
Help field is the text that the User will see on the right hand side of the screen when as Help text. You can also imbed videos, pictures or links.
3. Text Area
Text Area is similar to the Text variable except that it creates a larger text area in the middle panel. This is handy if the contract contemplates an insertion of a large body of custom text. However, one limitation of Text Area is that it will not permit redlining of the inside text. The text area box will disappear if held within false boolean expressions, and appear if held within true boolean expressions.
Under Variable field, you name the variable. Characters that are permitted are A-Z, a-z, 0-9, and underscore. Special characters are NOT permitted, except for the underscore. An example would be "company_name" (without quotes).
The Display Name field is what the User will see when prompted to input the field. This can contain special characters including spaces, which should help in describing briefly the information the is requested from the User - for example, "Company Name". It can also be phrased as a question, as in: "What is the Company Name?"
You can set the initial number of rows of the Text Area, and also set either Placeholder or Default Text for Text Area. You can disable the border of the Text Area box to make the text look more integrated with the rest of the document.
Help field is the text that the User will see on the right hand side of the screen when as Help text. You can also imbed videos, pictures or links.
Adding Styles to TextArea
The User is able to add styling to the TextArea by utilizing simple HTML tags in the left input column (as opposed to the middle column), after clicking "Edit as HTML" button. For example, you can add text decorations by using HTML tags as follows: <b>Bold</b> <i>Italic</i> <u>Underline</u>
4. Number
Number field allows the User to input numbers. While it is true that you can put numbers into text boxes as well, Number field permits math function to work, and it will work better for any types of data analytics. In the app, it allows for simple and complex arithmetic, such as additions and subtractions. Please note that the math syntax requires the operation to come first, before the operands. For example, in the Provision Template, you can do: {{math 'add' number_variable_name 10}}
Under Variable field, you name the variable. Characters that are permitted are A-Z, a-z, 0-9, and underscore. Special characters are NOT permitted, except for the underscore. An example would be "employee_number" (without quotes).
The Display Name field is what the User will see when prompted to input the field. This can contain special characters including spaces, which should help in describing briefly the information the is requested from the User - for example, "Employee Number". It can also be phrased as a question, as in: "What is the Employee Number?"
The Placeholder is the "Default" text or value. It is required. If you are not sure what to put into this field, you can set it to zero or describe it, such as [Phone Number].
There is an option to place a comma every 3 digits (for large numbers), and round to two decimal places (for money). In the math function, if any of the variables contain either attribute, the answer will have the same attribute(s) as well.
Help field is the text that the User will see on the right hand side of the screen when as Help text. You can also imbed videos, pictures or links.
5. Date
Date field allows the User to input dates. The Date Picker calendar will also appear for the User to make it easier to pick a date. While it is true that you can put dates into text boxes as well, Date field permits math function to work. In short, it allows for simple arithmetic, such as additions and subtractions. The math syntax requires the operation before the operands. For example, in the Provision Template, you can do: {{math 'add-year' date_variable_name 7}}
Under Variable field, you name the variable. Characters that are permitted are A-Z, a-z, 0-9, and underscore. Special characters are NOT permitted, except for the underscore. An example would be "start_date" (without quotes).
The Display Name field is what the User will see when prompted to input the field. This can contain special characters including spaces, which should help in describing briefly the information the is requested from the User - for example, "Start Date". It can also be phrased as a question, as in: "When did employee start?"
The Placeholder is the "Default" descriptive text. It is required. If you are not sure what to put into this field, you can set it to [Date].
Help field is the text that the User will see on the right hand side of the screen when as Help text. You can also imbed videos, pictures or links.
6. Boolean
Boolean holds value TRUE or FALSE, and displays to the User as a Radio button. They must choose one or the other, and null value is not permitted. Because of its flexibility, you can also use it as a choice of two, such as Include/Exclude or Registered/Non-Registered. Although appearing simple, Booleans are probably the most frequently used variable types, as they are able to manipulate the document beyond the purview of the input field. For example, when used in conjunction with IF statement in the Provision Template, you can add or delete large portions of text using the following syntax:
{{#if boolean_name}}This text will appear if boolean is true.{{else}} Otherwise, this text will appear.{{/if}}
Under Variable field, you name the variable. Characters that are permitted are A-Z, a-z, 0-9, and underscore. Special characters are NOT permitted, except for the underscore. An example would be "is_registered_transaction" (without quotes).
The Display Name field is what the User will see when prompted to input the field. This can contain special characters including spaces, which should help in describing briefly the information the is requested from the User - for example, "Type of Transaction". It can also be phrased as a question, as in: "Is this Registered Transaction?"
Inclusion text and Exclusion text are the text that will appear in the radio button as options. The default values are Include and Exclude, but if you are using Boolean as a choice-of-two, then you can rename them as necessary, such as "Registered Transaction"/"Non-Registered Transaction" or "Yes/No".
The Default Value is required. It is initially set to TRUE.
Help field is the text that the User will see on the right hand side of the screen when as Help text. You can also imbed videos, pictures or links. You can also show to user the % of users choosing either option.
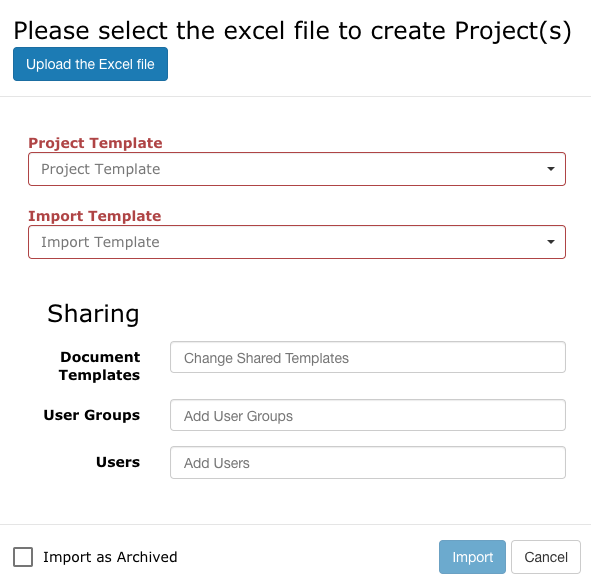
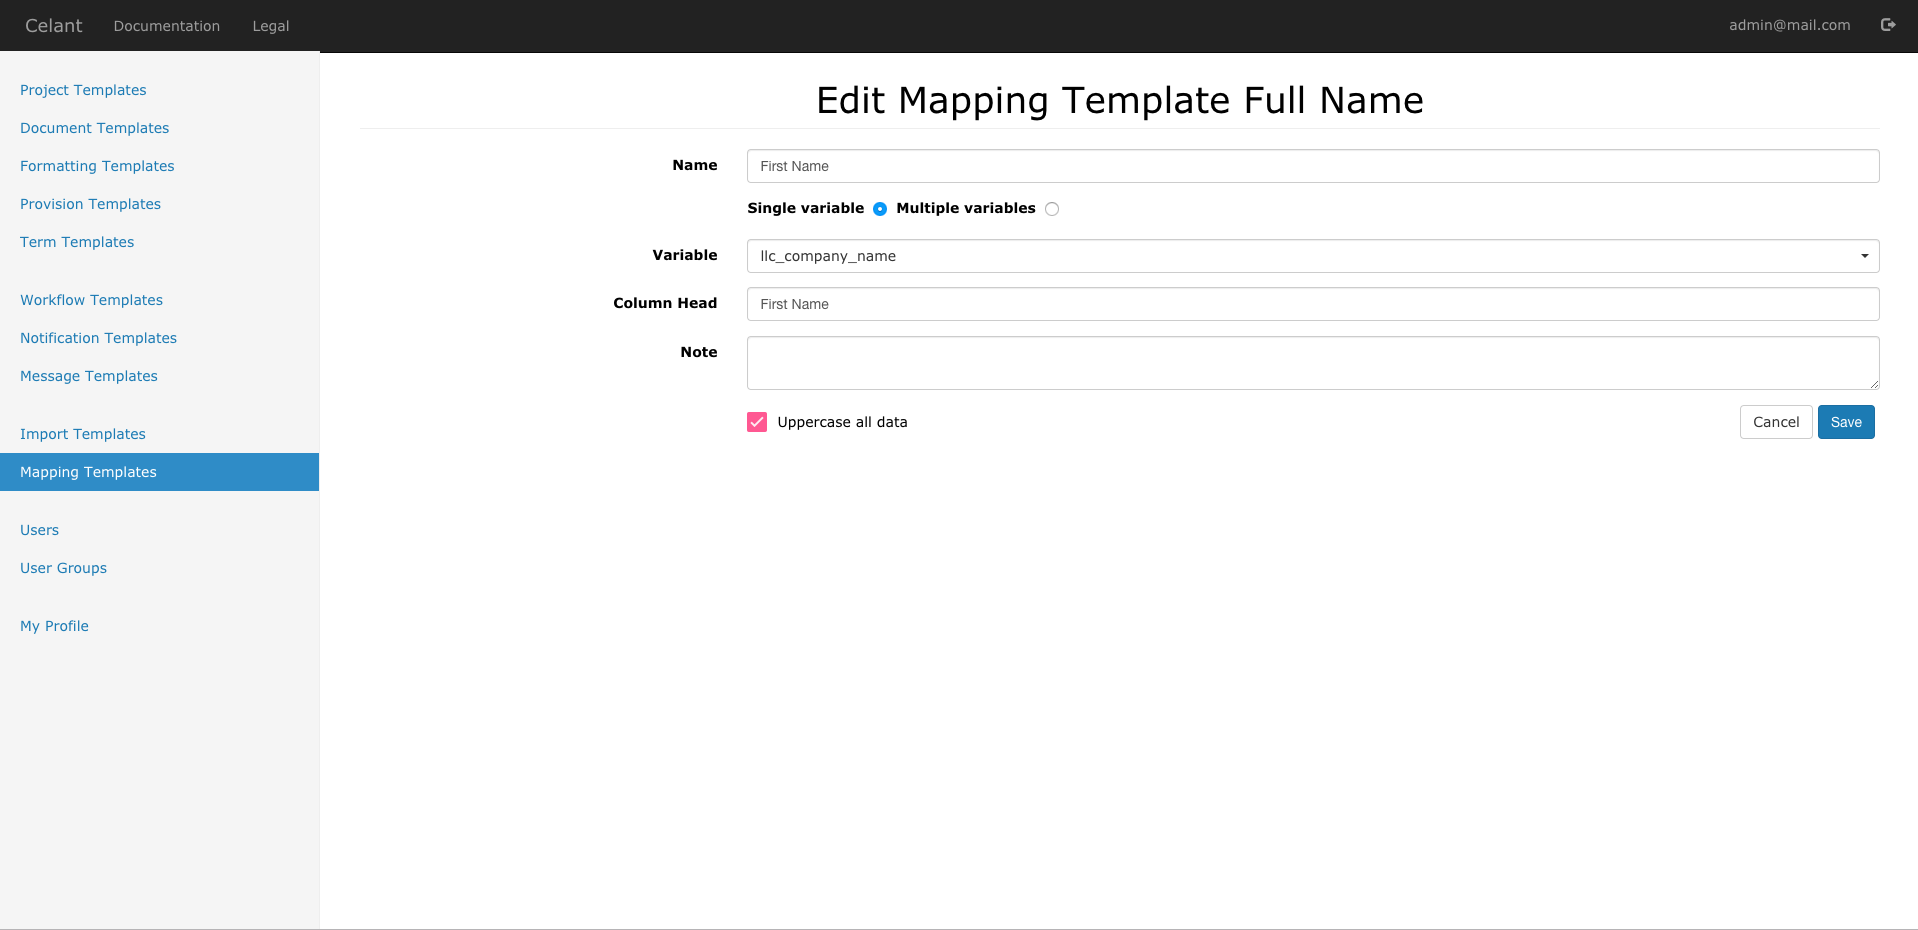
7. Variant
While Boolean is flexible and useful, especially in conjunction with the use of IF, it is limited to a choice of two: TRUE and FALSE values. When more alternatives than two are required, Variant is the Term Template that can handle the task because it can have unlimited options.
Under Variable field, you name the variable. Characters that are permitted are A-Z, a-z, 0-9, and underscore. Special characters are NOT permitted, except for the underscore. An example would be "filing_type" (without quotes).
The Display Name field is what the User will see when prompted to input the field. This can contain special characters including spaces, which should help in describing briefly the information the is requested from the User - for example, "Filing Type". It can also be phrased as a question, as in: "What Document are you filing?"
Click on Add option, and give name to the Option. This option name will be used in the Provision Template, if you want to use it with the IF statement.
Out of the Options, you need to choose a Default value. It is required. The dropdown will update to reflect the Options that have been added. If you are not sure what to put into this field, you can set it as the first item in the dropdown.
Help field is the text that the User will see on the right hand side of the screen when as Help text. You can also imbed videos, pictures or links.
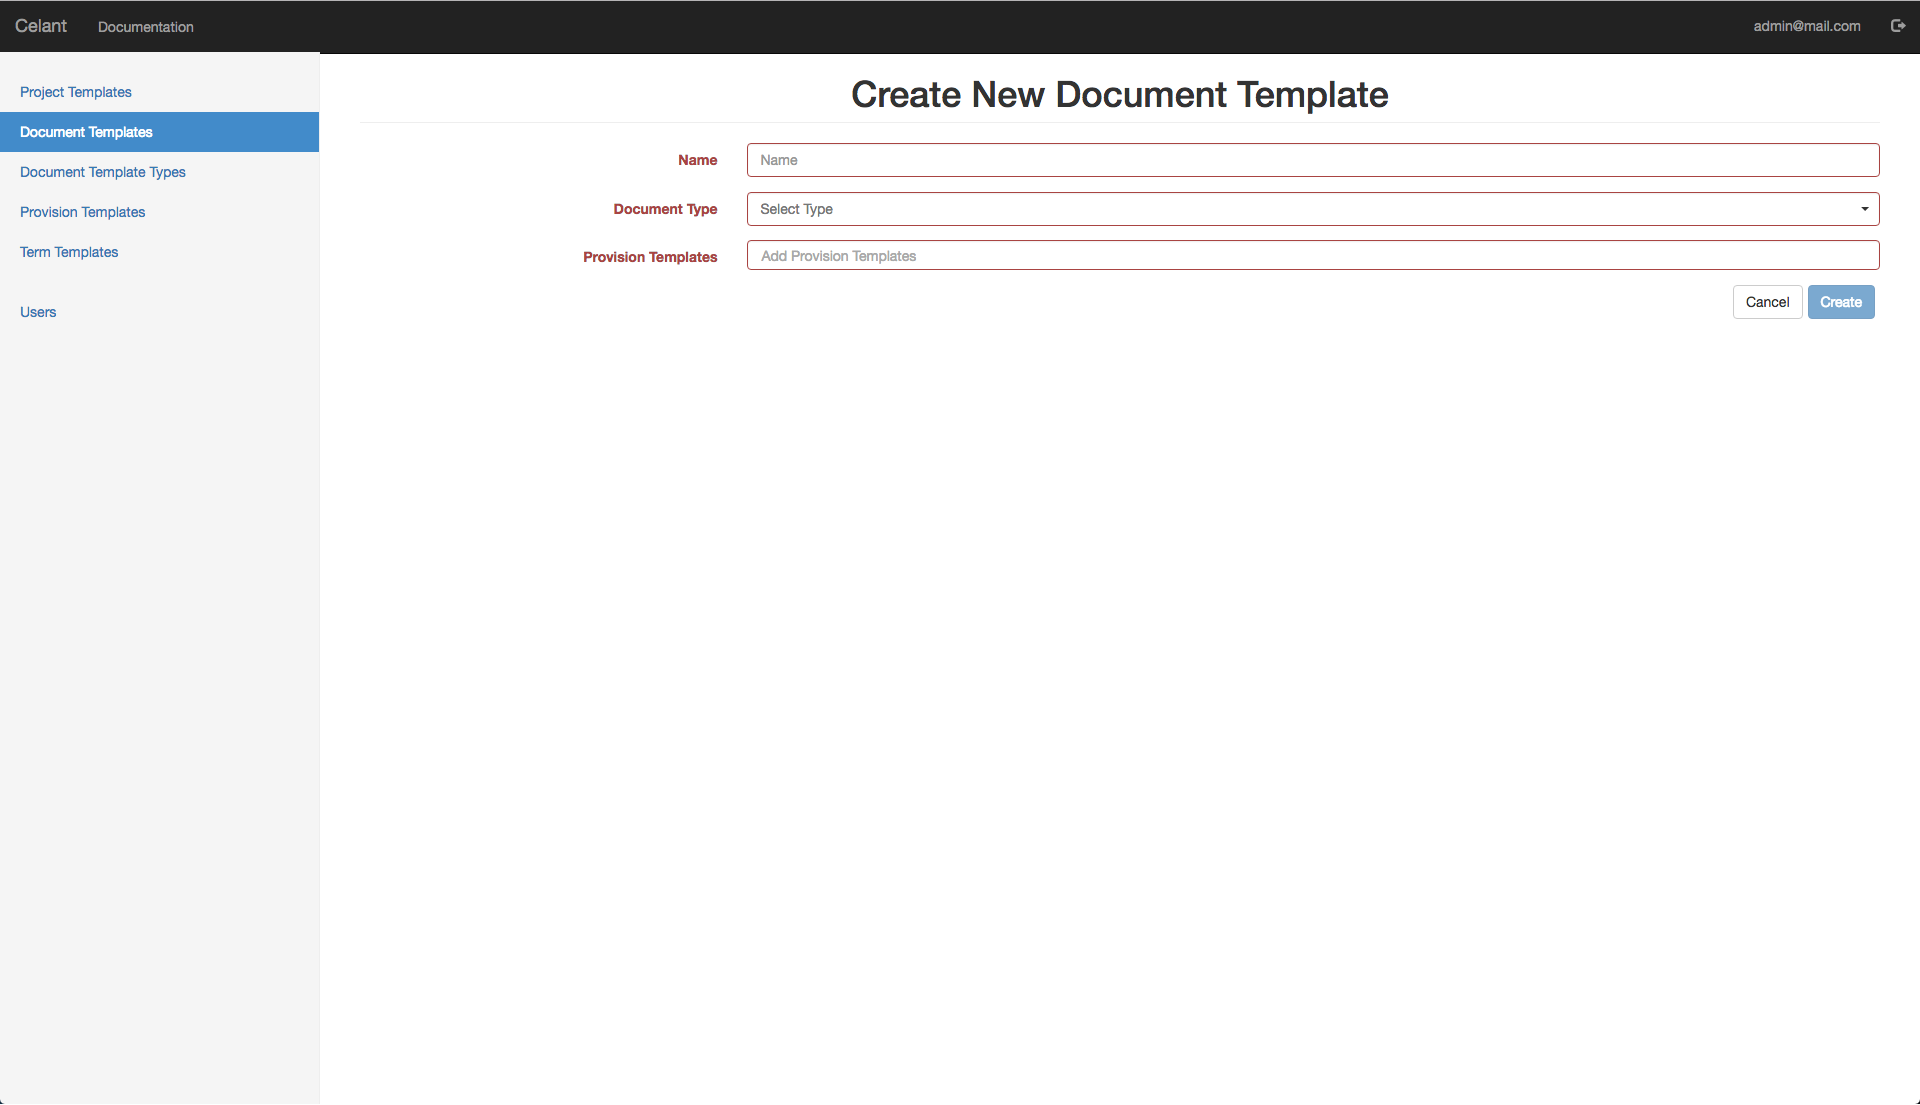
Provision Templates
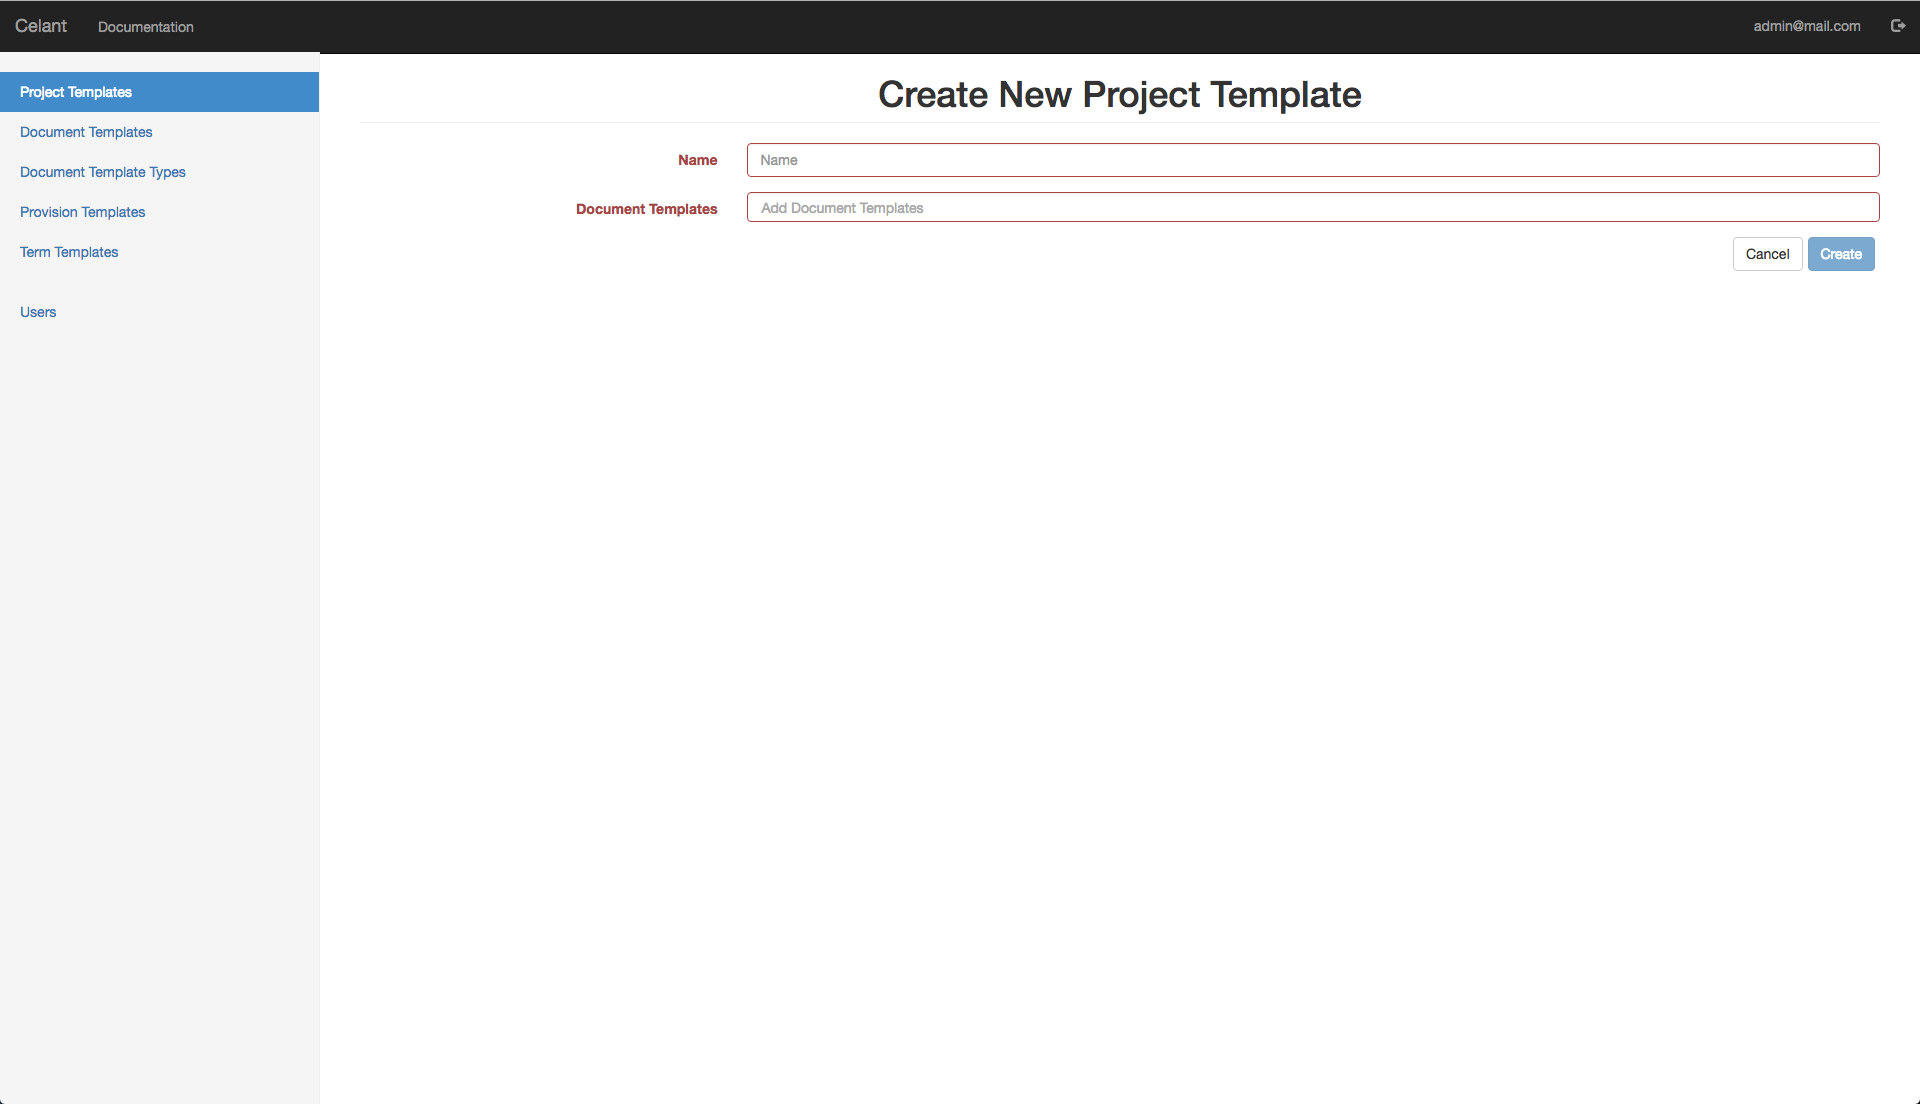
Provision Templates use Term Templates, regular text and other functions to build paragraphs, or "Provisions". These Provisions will be collected later to form a Document via the Document Template later on.
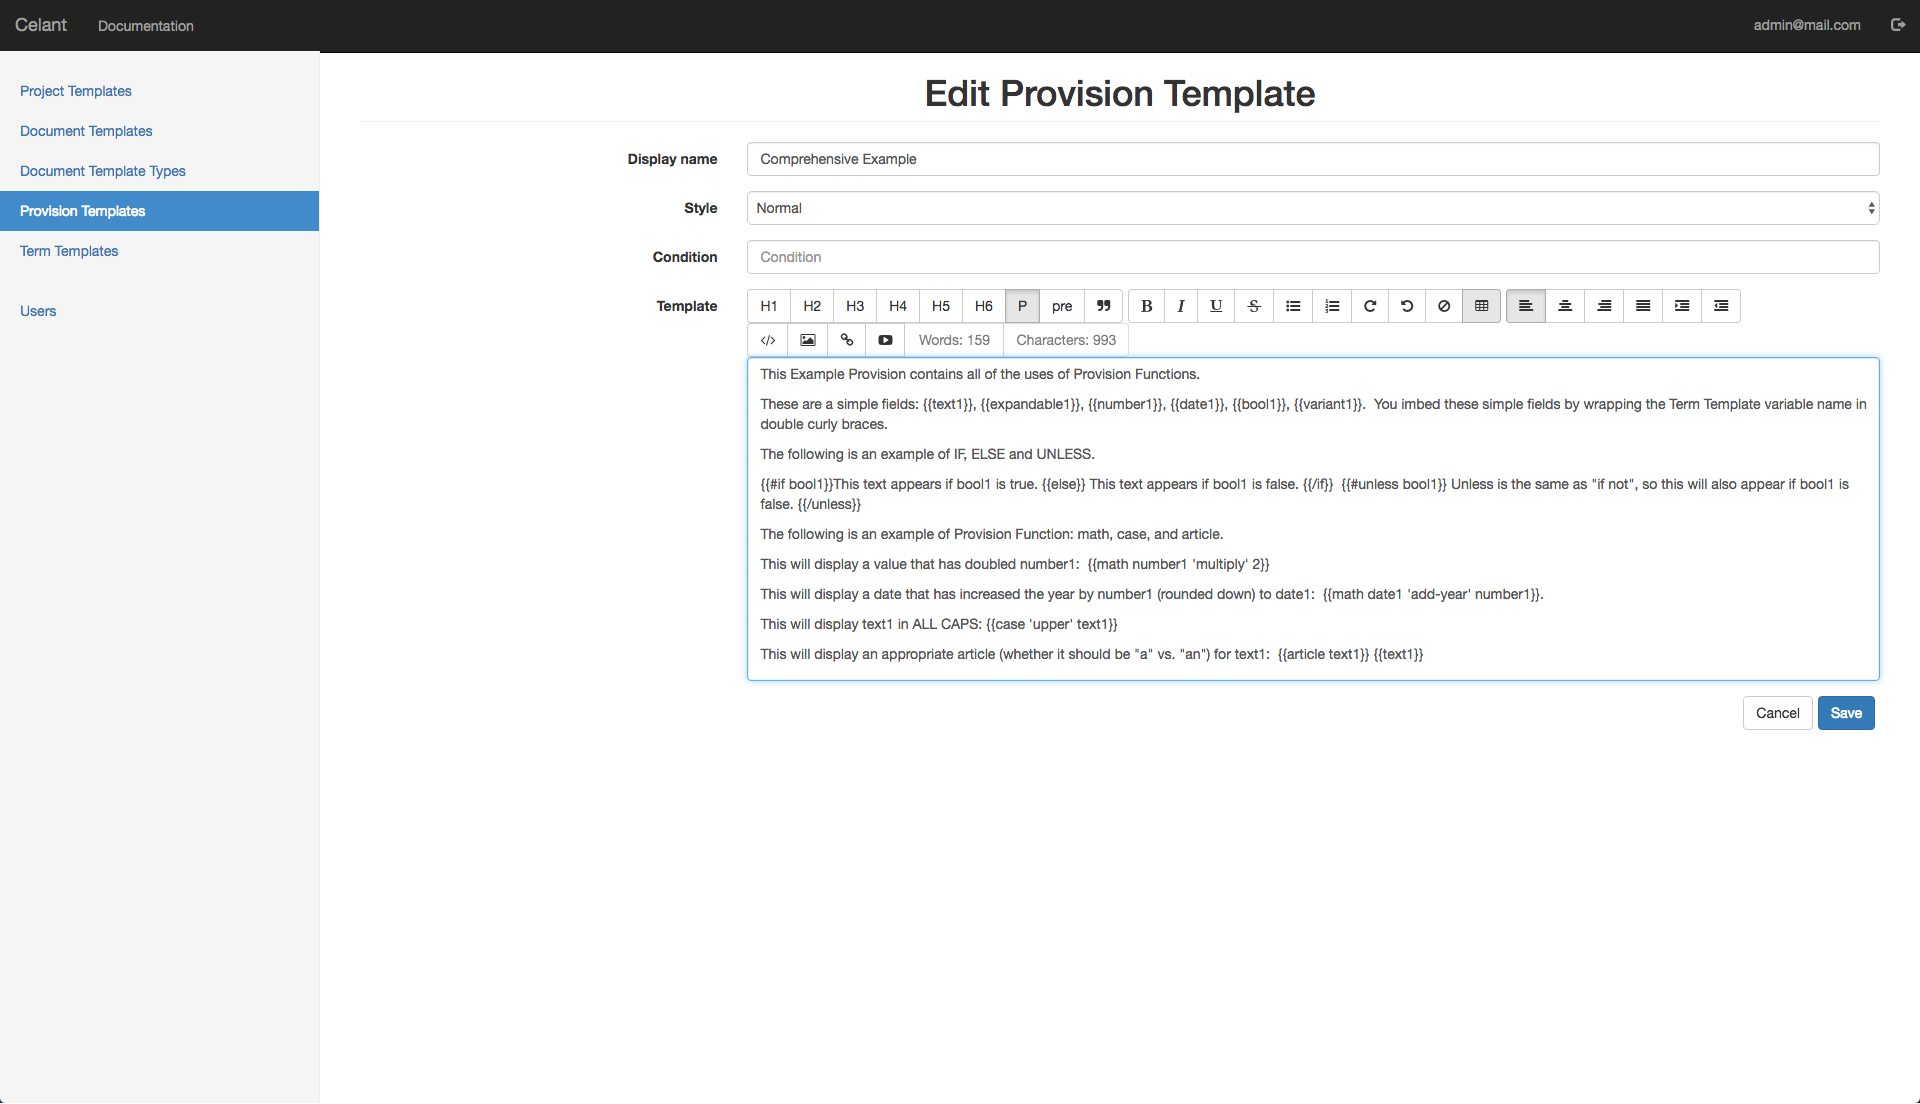
1. New Provision Templates
Display name is the name that will be used when identifying this provision in the Document Template section. It is only used to for this purpose.
Style is used to tell the application which portions of the document are signature pages. Normal is default, which means that the portion is NOT a signature page. If a portion of the document is a signature page, then marking it such will allow the User to output only signature pages, which can come in handy in transaction documents that contain many signature pages.
Condition is a conditional statement in the format of ifCond (without the double braces {{ }})that needs to be evaluated to be true (or blank) to display this Provision. Once the Author starts to specify the condition, an additional input called "False Message" appears, which will be displayed when the condition is evaluated to be false. No redlining will be shown; the entire provision will be replaced with the False Message, which can be blank. You can leave the condition blank and have the provision always be shown. The main use case for conditions attaching to the entire provision, is if certain documents become inapplicable as a result of user's decisions.
Template is where you type in regular text, together with embedded Term Templates and other Provision Functions to create logic-enabled template. This is the screen in which Authors will spend the most time.
2. if, else and unless statements
If, Else and Unless statements work together with booleans to make the magic happen! This is because long text strings can be wrapped in IF clauses, so that it appears and/or disappears when boolean values match. The syntax is:
{{#if boolean_termtemplate}} This is the text that will appear if boolean_termtemplate is TRUE. {{else}} This is the text that will appear if boolean_termtemplate is FALSE. {{/if}}
Be mindful of the # when opening the if clause, and always end it with {{/if}}.
Unless is the opposite of If; you can think of it as if-not. The syntax is:
{{#unless boolean_termtemplate}} This is the text that will appear if boolean_termtemplate is FALSE. {{else}} This is the text that will appear if boolean_termtemplate is TRUE. {{/unless}}
Again, be mindful of # when opening unless, and always close with {{/unless}}
{{else}} always has to be within {{#if bool-name}} ... {{/if}} or {{#unless bool-name}} ... {{/unless}} tags. Both If and Unless can be nested within other If and Unless statements.
Long Spanning IF Statement
One thing that is important to note is that IF statements need to be within a "carriage return" of the text it is modifying. If there are "enter/return" characters in between, it is unable to process it. One way to work around this limitation is to use If Statements for each paragraph.
In addition, if you want to use more complex logic including AND/OR, you will need to use ifCond, which is described later.
3. ifCond Statements
ifCond is used when complex logic is required. The syntax is similar to if, but it is able to handle two inputs. For examples:
{{#ifCond bool1 'and' bool2}} If both bool1 and bool2 are true, this text will appear.{{else}} Otherwise, this will appear. {{/ifCond}}
{{#ifCond bool1 'or' bool2}} If both bool1 or bool2 are true, this text will appear.{{else}} Otherwise, this will appear. {{/ifCond}}
The 8 operators are as follows: 'and', 'and-not', 'not-and', 'not-and-not', 'or', 'not-or', 'or-not', and 'not-or-not'. The order of first and second booleans are important, especially when determining operators such as 'and-not', since the second boolean must be false for the condition to pass. The nested content is displayed when the result of the expression is true.
Please be mindful that the quotation mark is a 'dumb' quotation mark, and smart quotation marks will confuse the application. Again, be mindful of # when opening ifCond, and always close with {{/ifCond}}
Advanced Nested Expressions
IfCond statement not only supports expressions with two variables - it also supports nested expressions using parentheses such as
{{#ifCond (boolean_1 'and' boolean_2) 'or' (boolean_3 'and' boolean_4)}} Text to be subject to the complex nested expressions {{else}} Otherwise, this text appears. {{/ifCond}} All of the redlining will work too, magically!
4. ifVariant Statements
ifVariant is used when 3 or more options need to be presented to the user. Whereas IF and ifCond use booleans to develop complex result, ifVariant is complex in its own way by providing 3 options or more from the beginning. For examples:
{{#ifVariant variant_variable 'Option One'}} If Option One was selected by the user, this will appear.{{else}} Otherwise, this will appear. {{/ifVariant}}
{{#ifVariant variant_variable 'Option Two'}} If Option Two was selected by the user, this will appear.{{else}} Otherwise, this will appear. {{/ifVariant}}
Please be mindful that the quotation mark is a 'dumb' quotation mark, and smart quotation marks will confuse the application. 'Option Name' used in the code will also be the same exact text presented to the User for the dropdown menu so make sure it looks presentable (and spaces are OK). Again, be mindful of # when opening ifVariant, and always close with {{/ifVariant}}
The negation version of ifVariant is unlessVariant. It works as expected, that is, it is the logical equivalent of IF-NOT 'Option One'. It uses {{/unlessVariant}} as the closing tag.
ifVariant vs. ifCond
For truly advanced logic, ifVariant can be combined with ifCond, simply by incorporating it into an ifCond statement with a slight tweak to the syntax by adding "is" as follows:
{{#ifCond variant_variable is 'Option Two' 'and' boolean_variable}} If Option Two is selected by user and boolean_variable is true, this text will appear {{else}} Otherwise, this text will appear.{{/ifCond}}You will also be able to nest multiple conditions using parentheses. You will find as you create templates that many decisions and choices will be handled via booleans using #if statements. But more advanced users will appreciate the power of having multiple options permitted under #ifCond and #ifVariant, as it permits elegant solutions and a 'cleaner' redlining.
5. ifPlural Statements
The ifPlural function is used to further specify the functionalities of Text Plus. As mentioned in that section, Text Plus is capable of displaying series of text boxes, which are helpful when there are multiple parties to an agreement, multiple children in a will, etc. And as every English speaker knows, when there are multiple subjects, verbs will often need to be changed. Therefore, ifPlural is the function that determines whether a specific Text Plus variable contains multiple values, and if so, display certain text. The syntax is as follows: {{#ifPlural text_plus_variable}}This is the text that would show if text_plus_variable contains multiple data points{{else}}This is the text shown otherwise.{{/ifPlural}}
An example could be:
{{friends_name}} {{#ifPlural friends_name}}are{{else}}is{{/ifPlural}} my best friend{{#ifPlural friends_name}}s{{/ifPlural}}!
What about ifSingular?
Right now, the correct syntax is to use unlessPlural, which works as opposite of ifPlural.
6. math Function
math function is used to manipulate Number and Date Term Templates. Simple algorithms are supported for Numbers, which are: 'add', 'subtract', 'multiply', 'divide' and 'power'. Synonyms are also supported: 'plus', 'minus', 'multiplied_by', and 'divided_by'. Parentheses can be used when a complex formula is needed. The syntax is to state the operation in a quotes and then the two operands, similar to the Lisp computer programming language, as follows: {{math 'add' number1 number2}} or {{math 'power' number1 3}}
For date manipulation, only additions are currently supported. They are: 'add-day', 'add-month', and 'add-year'. For example: {{math 'add-year' date1 tenor_years}} or {{math 'add-month' date1 6}}. They are useful for determining maturity dates from closing or effective date, and due dates of deliverables, etc. When a value has not been entered by a user, a placeholder of [CALCULATED NUMBER] will be displayed in the place of the math function.
Unlimited Nesting
You are able to nest unlimited number of operations, but you have to feed it to the app in ways it is able to understand, which is in a group of 'threes' using parentheses (operation, then two operands). For example:
{{math 'divide' ('minus' annual_base_rent_amount ('divide' annual_base_rent_amount ('add' 1 ('divide' annual_sales_tax 100)))) 12}}
7. case Function
case function is used to manipulate text Term Template, in terms of its casing. The supported changes are: ALL CAPS, all lower case, and Title Case which use the following commands: 'upper', 'lower', and 'title'. The syntax is as follows: {{case 'upper' text1}} or {{case 'title' text1}}
ALL CAPS ARE USEFUL
'upper' is helpful on the cover page of a document, or in the signature blocks of documents since the name of the entities are frequently upper cased in those contexts.
8. article Function
The article function is used to insert an appropriate indefinite article, that is, "a" or "an" in front of a text Term Template. It is much smarter than simple Does-the-word-start-with-a-vowel check and you will appreciate its high accuracy. The syntax is: {{article text1}}
Not Duplication
The article function only returns "a" or "an" so in a document, you will most likely need to place the text it is determining for, so it would look like: {{article text1}} {{text1}}. Remember to put a space between the two.
9. alpha Function
The alpha function is used to convert numbers, like 32, into words, like "thirty two". The alpha function syntax is similar to the case function, in that casing designation is required, which are: 'upper', 'lower' and 'title', as follows: {{alpha 'upper' number_var}}
10. amort Function
The amort_table function is used to create an amortization table. It creates a monthly payment amortization table, and requires 5 variables: 1. the total loan amount; 2. the annual interest rate (as integers, not decimals); 3. the tenor in months; 4. the payment start date, and 5. the length of interest payment only period, as follows: {{amort_table loan_amount interest_rate loan_tenor_option payment_start_date int_only_period}}
There is a sister function for calculating the monthly amortization payment, using 3 parameters: 1. the total loan amount; 2. the annual interest rate (as integers, not decimals); 3. the tenor in months, as follows: {{amort_payment loan_amount interest_rate tenor_months int_only_period (optional)}}
There is a legacy function called 'amort' for doing the amortization table with tenor in years, intead of months.
Custom Functions
If the math function is insufficient to create a formula for your needs, or is becoming too cumbersome, our customer service department can implement any custom function necessary.
11. Page Break
The middle panel view is a continuous view with scrolls, and there is no demarcation for separate pages. This is a common behavior with HTML documents. However, when this document needs to be converted to PDF or MS Word, there will inevitably occasions in which a page break will be necessary. In that case, the Author can use in the Provision Template, the page break function: {{pagebreak}}
When used, it will not be visible in in the middle panel until it is converted to PDF or MS Word format.
12. Table of Contents
The table of contents in DOCX is frequently automatically created, so that it does not need to be updated manually when the document is altered. This dynamic table of contents can be created using the {{table_of_contents}} function. You denote each article with {{#article_header}} and section with {{#section_header}} and the application will create a table of contents with appropriate page references in DOCX using these headers. {{#table_of_contents}}{{/table_of_conents}}
{{#article_header}}Article I. Definitions{{/article_header}}
{{#section_header}}Section 1. Term Usage{{/section_header}}
13. Expand
The expand function is used to further specify the functionalities of Text Plus. As mentioned in that section, Text Plus is capable of displaying series of text boxes, which are helpful when there are multiple parties to an agreement. In Text Plus, the Admin is able to set whether there should be a 'return' at the end of each field, or whether it should insert commas or 'and'. However, sometimes this default setting needs to be overridden. For example, commas would be useful for in-text while new lines would be useful for signature blocks. The syntax is as follows: {{expand name_of_text_plus_variable X}}
X is a number where: 0 = items are listed without any special character; 1 = commas and 'and' is included' 2 = new line is included; 3 = both commands/and new lines are included. 4 = reverts back to nothing, so essentially same as 0.
14. Loop
The loop function is useful when you need to repeat an identical list or paragraph multiple times, with different values for the input items. Combining the loop function with text-plus type of term templates, the user is able to store different data per loop. This feature comes in handy, if x number of signature blocks are required, or in a will or trust, allocation of assets to y number of children. The syntax is as follows:
                                      {{#loop number_variable}}


____________________________

Name: {{loop_var text_plus1}}

Title: {{loop_var text_plus2}}
{{/loop}}
The loop function can accept (i) a number variable; (ii) a constant number; (iii) a text plus term template (where its value equals 1 plus the number of + has been pressed) or (iv) a variant term template (where its value is the selected option, if it is a number), and whatever is imbedded within the loop will be repeated that number of times. If different values are required to be stored per loop, text-plus type of term template should be used with the keyword loop_var; if they need to be identical, without using the keyword. If the number of iteration on each loop needs to be accessed, the Author can use the keyword loop_index to show the number sequence within the loop (1, 2, 3, etc.).
Workflow Overview
Similar to how Project Template is constructed from its smaller components, workflow automation is achieved by Workflow Template, which is made up of smaller components. Some workflow automation is easy, so it can be done within workflow, but advanced tasks like sending out reminders require setting up the smaller components, such as Notification and Message Templates. We will take a look from the smallest to largest, in terms of the categories: Message Templates, Notification Templates, then Workflow Templates.
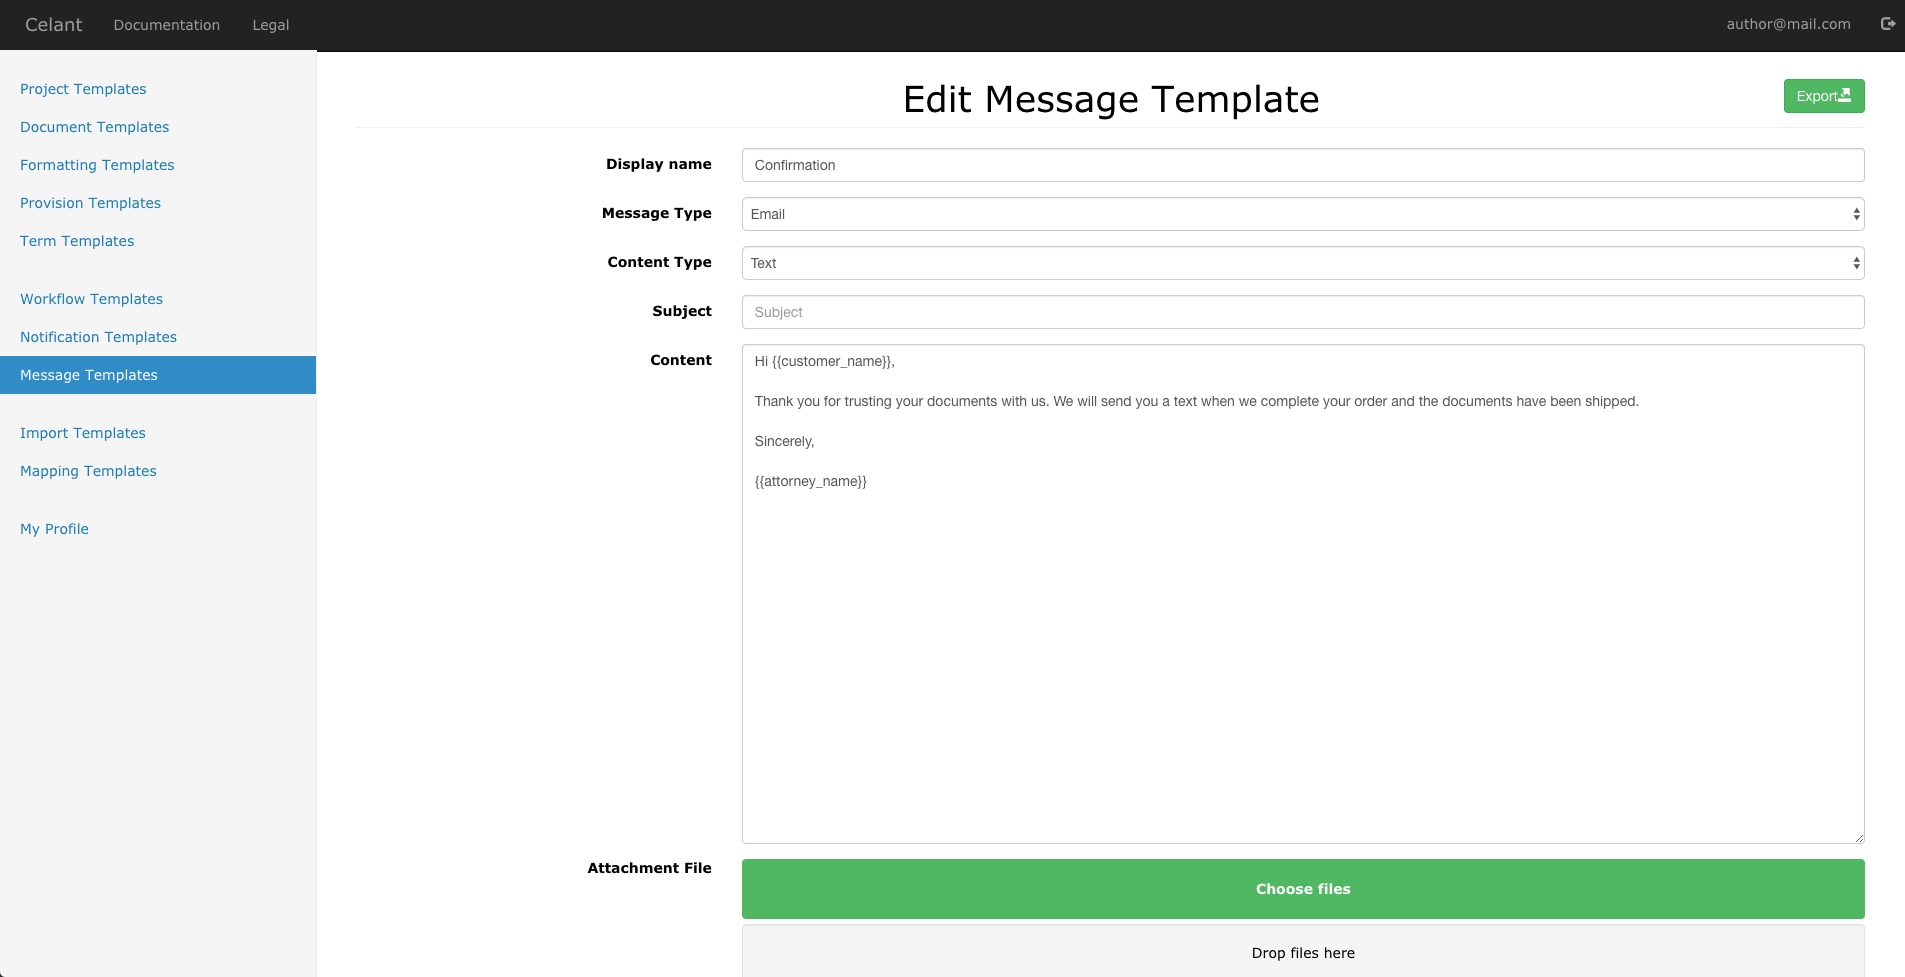
1. Message Templates
Message Template is used for both SMS (text) or Email types of messages. For SMS, you simply put in the content, which can contain variables or conditional statements, the same way as the Provision Template. For email types, it is similar but you have more options: you can set the content type as HTML or simple text; set the subject of the email; or attach attachments, up to 10mb in size.
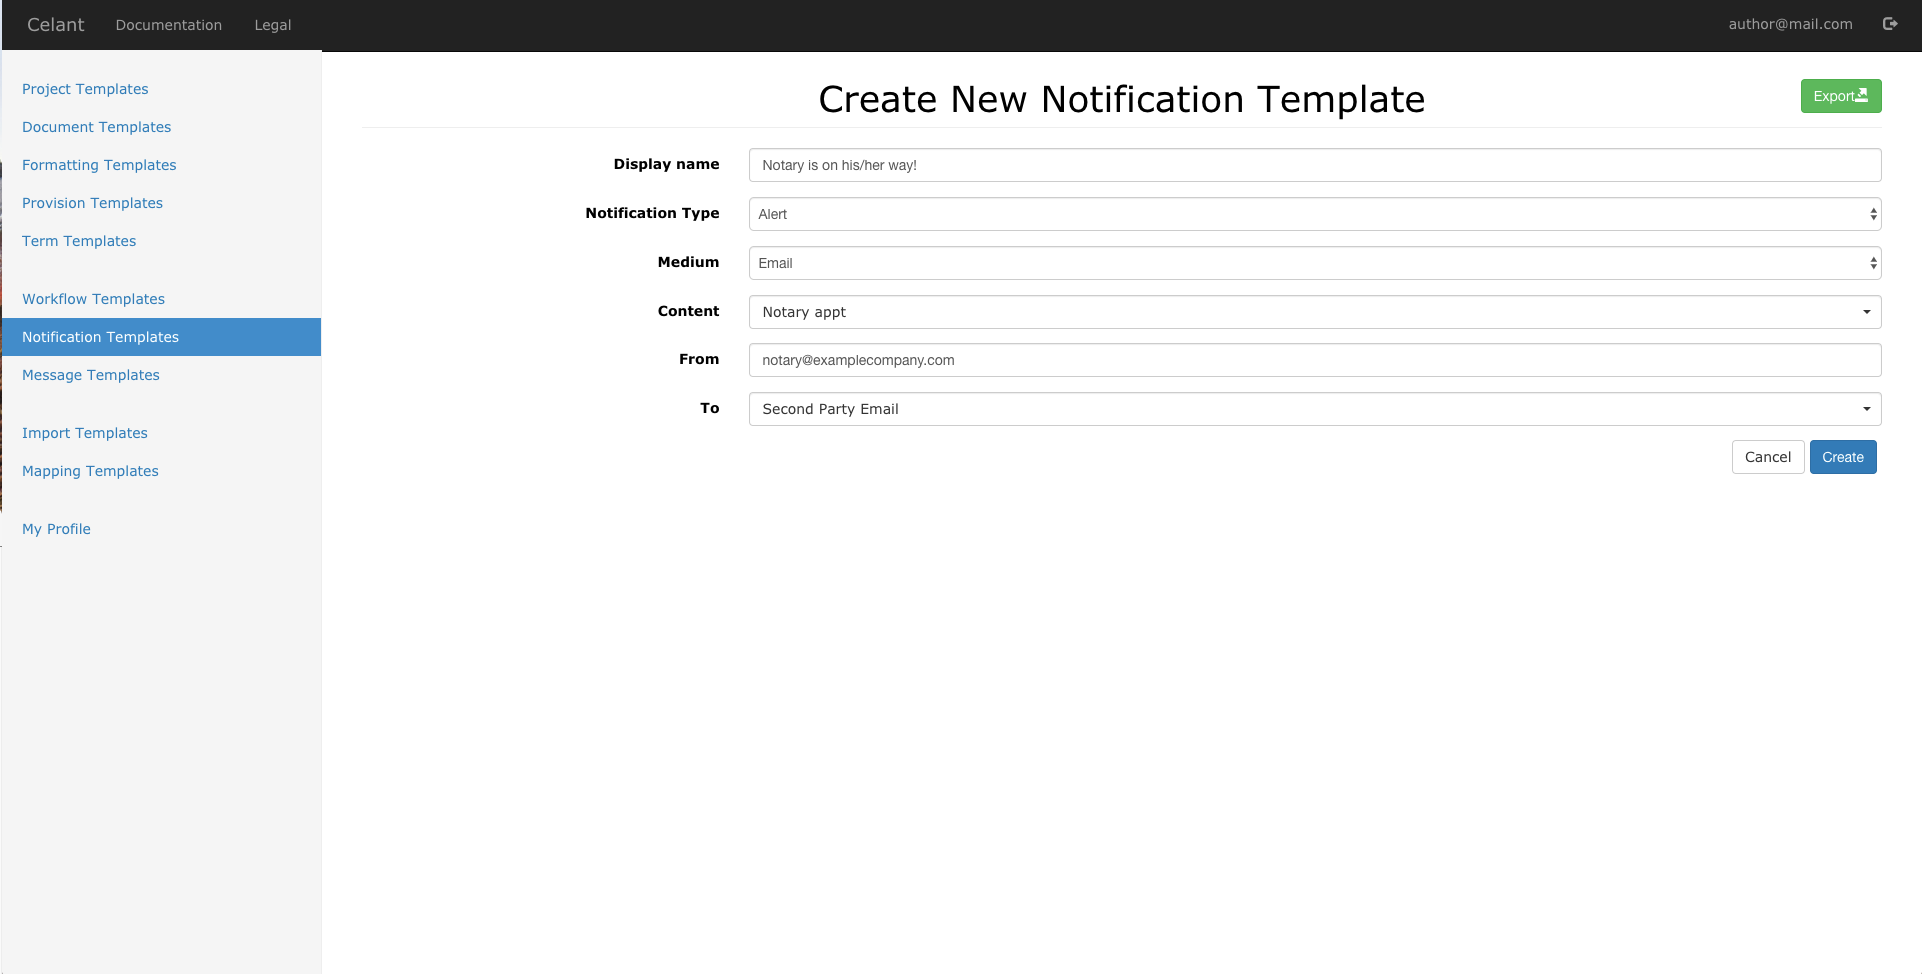
2. Notification Templates
Notification Template is utilized for outgoing messages to be used in the Workflow Template, and the Notification Template takes the Message Template and adds more attributes and characteristics. Notification Template has two types: (i) Alert, which is sent when something happens (i.e. an event occurred, or even another email was sent), and (ii) Reminder, which is sent out based on a scheduled event and conditionality set forth in the Notification Template. In the Alert setting, the author chooses the medium (SMS or Email), sets the Content from one of the Message Templates, and provides other information such as "From" and "To" fields, selected from a variable.
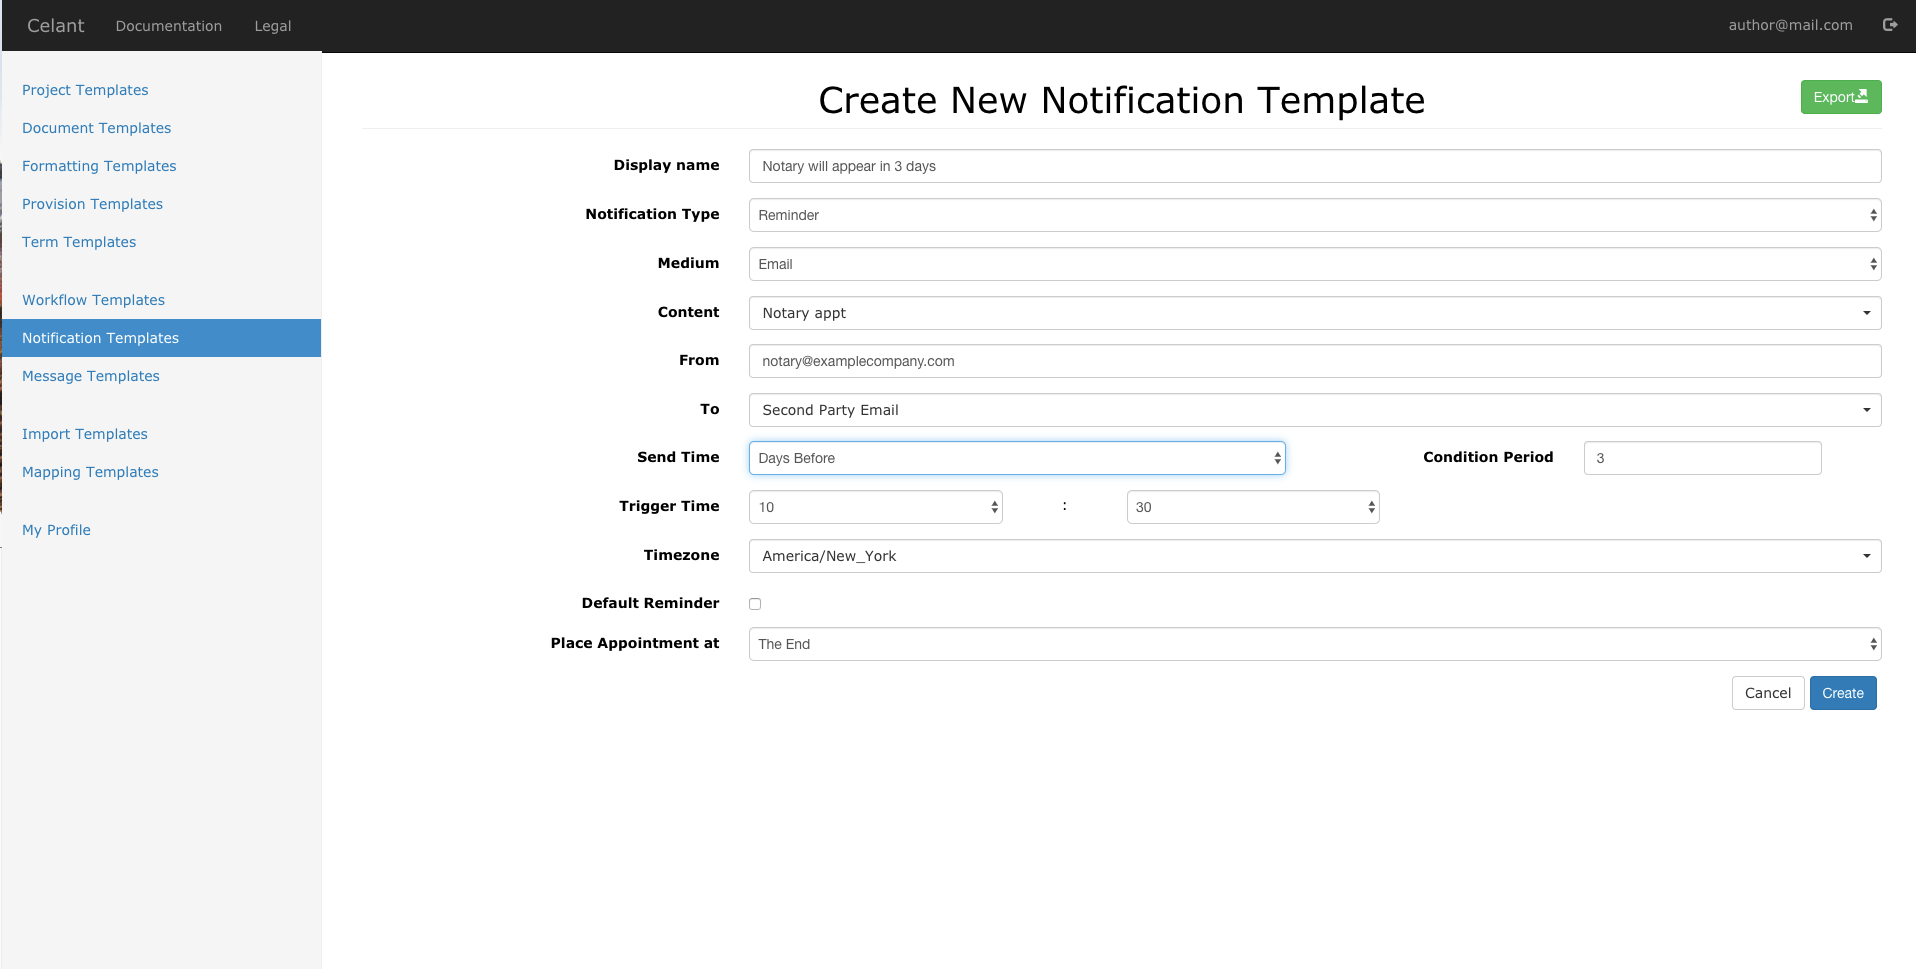
In the Reminder setting, there are additional fields, to specify the trigger time. Send Time is set "Days Before" and Condition Period specifies how many days in advance the reminder is sent. If set at zero (0), it will be sent out on the same day as the appointment. The Trigger Time specifies at what time the reminder is sent, and the Time zone specifies the time zone that would apply to this notification. Default Reminder setting means that all scheduled appointments will have this reminder by default, unless deleted. The "Place the Appointment at" field specifies whether the appointment time will appear at first, end or not at all, in the Message Template.
Note:
Typically, 3 days before the appointment in the morning, and the evening the day before the appointment, are good times to send out the reminders. In such cases, two notification templates would be set, perhaps one as email, and another as text.
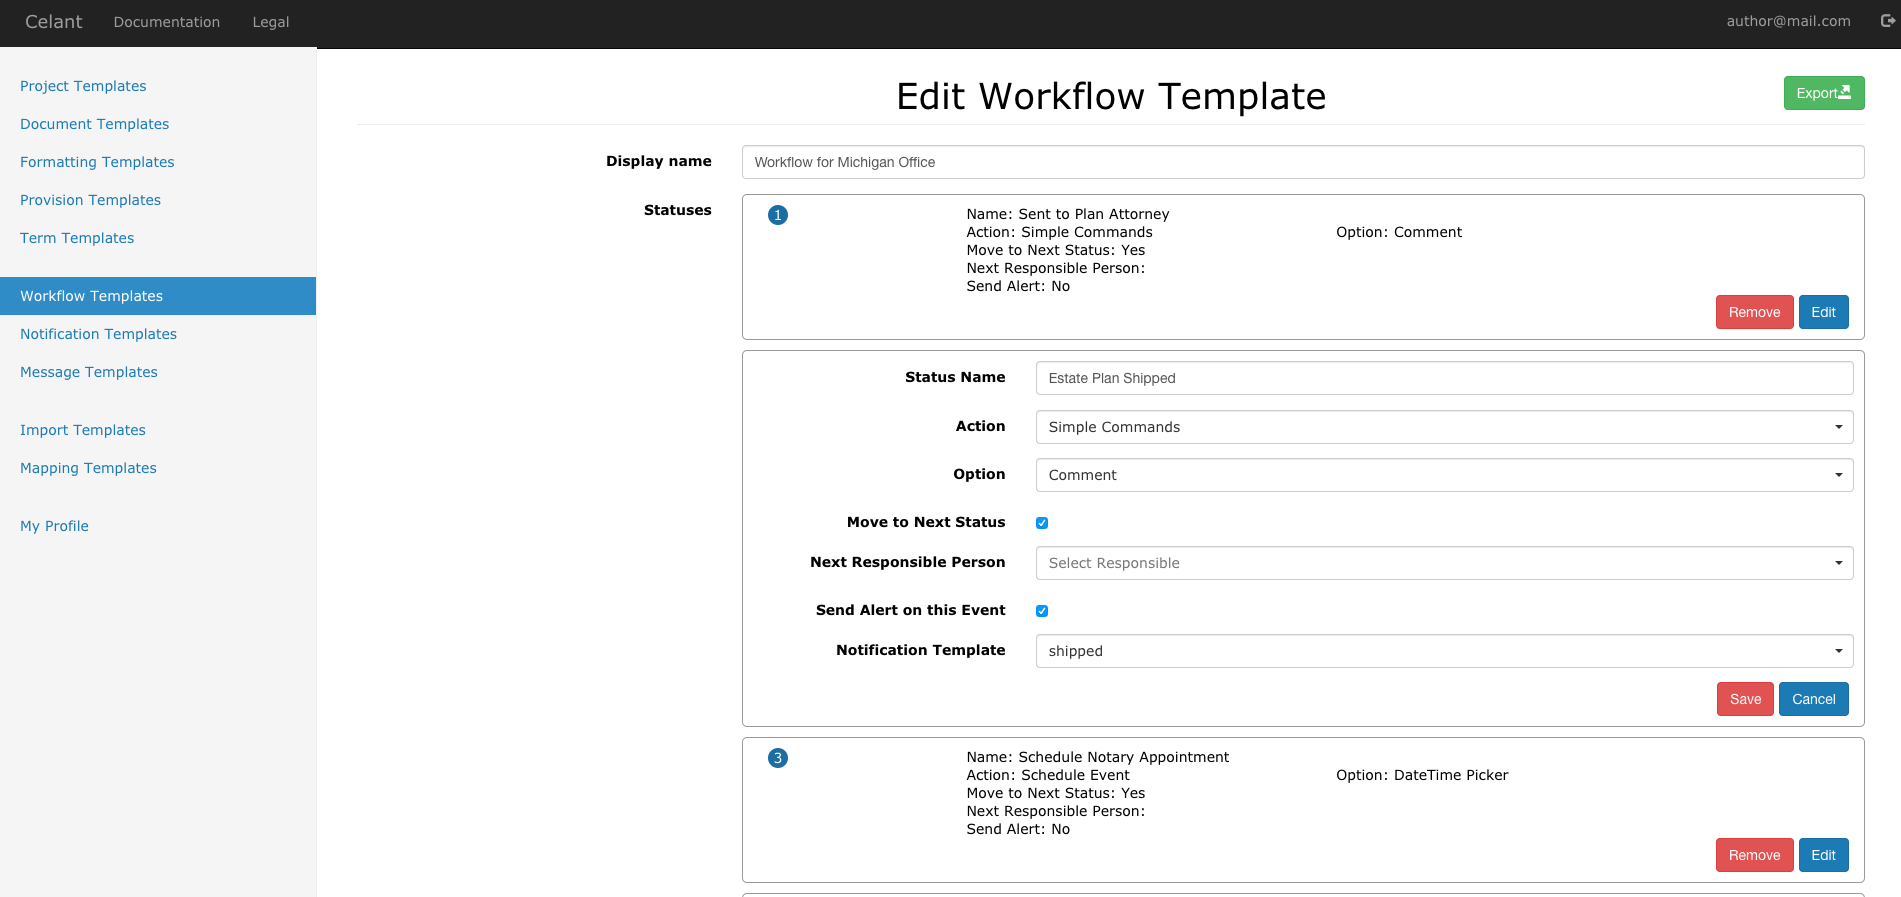
3. Workflow Templates
The application allows automation of ancillary workflow templates by creating Statuses, which are "steps" within the Workflow. Each Status has one Action, which can be: Simple Command (Show a message, accept a comment, or mark as complete); Open Editor (directly go to a document in the editor); Assign Value (to a variable, to allow change in email, phone, etc.); Share Project (with other members, if they don't already have access); Send Email or SMS; Download DOCX, PDF, or CSV; Schedule an Event; or Archive.
After setting up the Status, they can be used within the Workflow Template (which is an ordered list of Statuses), to setup elaborate workflows. Each Workflow has the ability to 'Move to Next Status', set 'Next Responsible Person' (if any), and send Alert on this Event.
It is also possible to include "Goto Step X" statements to increase the complexity of the Workflow.